
I went down the hole of installing Linux on my phone (Samsung Galaxy S7). The easiest path is compiling and installing UBports, some people have heavily started the process but it is still a work in progress.
This is the first part: step by step description to build and boot the system, with helpers scripts to setup the system once flashed.
The first part is my notes gathered during the initial build. You can install TWRP then jump directly to the step by step at the end of this page.
State
This is the status of working features with my current build, some others are more advanced.
- [ X ] Wi-Fi
- [ X ] Web browsing
- [ X ] MP4 playback
- Bluetooth
- Camera
- Sim card
- Phone calls
- SMS
- MMS
Documentation
- https://docs.halium.org/en/latest/porting/first-steps.html
- https://www.doof.me.uk/2020/04/06/installing-gnu-linux-on-my-samsung-s7/
- https://docs.halium.org/en/latest/supplementary/devices/herolte.html
- https://github.com/Halium/projectmanagement/issues/48
TWRP installation
Just follow official instructions https://forum.xda-developers.com/t/recovery-exynos-official-twrp-for-galaxy-s7-herolte.3333770/
Issue “Custom binary blocked by FRP lock”
Go to Android developer options, activate enable OEM unlock slider.
Halium compilation
Under Debian Bullseye it is not in the docs and might be obvious, but ADB must
be installed apt install adb.
First steps
Set up your build device
Package python-markdown does not exists, to be replaced by python3-markdown
The error E: Unable to locate package repo is because contrib repo needs to
be activated in /etc/apt/sources.list.
Get Halium source
Adding device-specific source
android_device_[manufacturer]_[device]=android_device_samsung_herolte
lineage.dependencies file on
Github
File halium/devices/manifests/[manufacturer]_[device].xmlalready exists:
halium/devices/manifests/samsung_herolte.xml
Vendor blobs
Nothing to do? At least I did not for now.
Build Halium
Modify the kernel configuration
Clone mer-kernel-check outside of BUILDDIR . Then the command for Samsung S7
kernel is:
./mer_verify_kernel_config ../halium/kernel/samsung/universal8890/arch/arm64/configs/exynos8890-herolte_defconfig
Options I had to set:
# https://cateee.net/lkddb/web-lkddb/QUOTA.html
# If you say Y here, you will be able to set per-user limits for disk usage
# It does not work for me, the kernel is not able to mount partitions without.
CONFIG_QUOTA_NETLINK_INTERFACE=y

CONFIG_QFMT_V2=y
CONFIG_NETFILTER_XT_MATCH_MULTIPORT=y
CONFIG_IP_NF_MATCH_RPFILTER=y
Patch against 1046b86e869d6a77bc1f905b3a61bbd5e5478ee1: TODO
Include your device in fixup-mountpoints
Nothing to do, already included.
Building the system.img and hybris-boot.img
mka hybris-boot
Error:
/usr/bin/ld: scripts/dtc/dtc-parser.tab.o:(.bss+0x50): multiple definition of `yylloc'; scripts/dtc/dtc-lexer.lex.o:(.bss+0x0): first defined here
Due to a redundant declaration. Let’s make it extern in
./kernel/samsung/universal8890/scripts/dtc/dtc-lexer.l./kernel/samsung/universal8890/scripts/dtc/dtc-parser.tab.c_shipped
Error:
mkbootimg: command not found
Add it to the system path after compiling it.
export PATH=./system/core/mkbootimg/:$PATH
Halium reference rootfs
Flash Halium
Restart it download mode, flash hybris boot:
heimdall flash --BOOT out/target/product/herolte/hybris-boot.img
Install Halium rootfs and system
./halium-install -p halium ../halium-rootfs-20170630-151006.tar.gz ../halium/out/target/product/herolte/system.img
I gave up Halium rootfs
But I did not succeed to make Halium rootfs boot: I had a constant reboot loop. When I asked on Halium’s Telegram channel someone told me that it is a 4 years old rootfs and I should move on UBports rootfs, so I did :-)
UBports
UBports is a touch-friendly Ubuntu flavor maintained by a community, since Canonical dropped the Edge project.
Building the images
Fix mount points
No edit necessary to the fstab file, found at:
device/samsung/hero-common/ramdisk/fstab.samsungexynos8890
Fix defconfig
Command:
./halium/halium-boot/check-kernel-config kernel/samsung/universal8890/arch/arm64/configs/exynos8890-herolte_defconfig -w
First time I ran the command:
Config file checked, found no errors.

 Made 110 fixes.
Run it again:
Config file checked, found no errors.

 Made 1 fixes.
But the
lineCONFIG_DEFAULT_SECURITY is set, but to "selinux" y not "apparmor".is never
fixed. Fix it manually with CONFIG_DEFAULT_SECURITY="apparmor" then run it
again without the -w argument:
Config file checked, found no errors.
Ubuntu Touch requires setting console=tty0
console=tty0 is already defined in the kernel config file, so nothing required
Fix Apparmor
I did not try to understand why, but it is recommended in Github issue by and hoster in UBports Github, so let’s do it:
cd kernel/samsung/universal8890/security/
rm -r apparmor/
wget  https://raw.githubusercontent.com/ubports/apparmor-backports-ut/master/apparmor-3.18.tar.bz2
tar -xf apparmor-3.18.tar.bz2
Build halium-boot.img and system.img
Build as instructed
Installing UBports
As instructed in tge UBPort FAQ, use
xenial-hybris-edge-rootfs-arm64 from
https://ci.ubports.com/job/xenial-hybris-edge-rootfs-arm64
wget https://ci.ubports.com/job/xenial-hybris-edge-rootfs-arm64/lastStableBuild/artifact/out/ubuntu-touch-hybris-xenial-edge-arm64-rootfs.tar.gz
Flash boot image il download mode (phone off, long press on power+home+volume down)
./Heimdall/build/bin/heimdall flash --BOOT files/halium-boot.img
Reboot in recovery, flash system.img+rootfs
/halium-install -p ut ../files/ubuntu-touch-hybris-xenial-edge-arm64-rootfs.tar.gz ../files/system.img
Halium logging in
Wi-fi
As described nmtui then select Activate a connection.
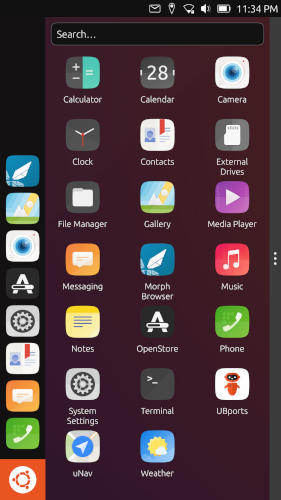
UBpots - The graphical UI
udev rules
sudo -i
cat /var/lib/lxc/android/rootfs/ueventd*.rc|grep ^/dev|sed -e 's/^\/dev\///'|awk '{printf "ACTION==\"add\", KERNEL==\"%s\", OWNER=\"%s\", GROUP=\"%s\", MODE=\"%s\"\n",$1,$3,$4,$2}' | sed -e 's/\r//' >/usr/lib/lxc-android-config/70-herolte.rules
Edit layout (From Github)
Edit /etc/ubuntu-touch-session.d/android.conf to add
GRID_UNIT_PX=29
QTWEBKIT_DPR=3.0
NATIVE_ORENTATION=portrait
FORM_FACTOR=handset
Add user to update
Step described in Github issue, why?
sudo adduser --force-badname --system --home /nonexistent --no-create-home --quiet _apt || true
Install xenial fix dataspace
Again, from Github. Probably linked to the new user creation to update packages
sudo ubports-qa install xenial_-_fix-dataspace
sudo ubports-qa remove xenial_-_fix-dataspace
sudo reboot
Step by step with to flash system.img and halium-boot.img and boot
This step by step guide is working for me, if you have an issue please read the previous chapter which might help to understand it. In all cases please leave a comment so I can fix the instructions.
Backup
Backup your user data if you want. This process will also create a TWRP backup for Android itself.
Install TWRP
Follow official instructions https://forum.xda-developers.com/t/recovery-exynos-official-twrp-for-galaxy-s7-herolte.3333770/
Setup UBports
Reboot in recovery
Reboot in recovery, it can be done with adb reboot recovery or switch off the
phone then power + volume down + home keys.
TWRP backup (optional)
If you want to be able to easily switch back to Android backup:
bootsystemdata
Format data partition
In TWRP:
- Touch
Wipe - Touch
Format Data - Enter
yes - Go back to home menu thanks to the home button
Flash the boot and file system to the device
Still in TWRP:
-
Clone Halium install.
-
Download UBports rootfs.
-
With sudo, or as root:
./halium-install -v -p ut ./path/to/ubports-touch.rootfs-xenial-armhf.tar.gz ./path/to/system.imgNote add-iif your want to have yourid_rsa.pubkey copied -
Enter the password for the phone’s new user.
-
When finished, then reboot in download mode. In TWRP:
- Touch
reboot - Touch
Download
- Touch
-
Download and compile Heimdall.
-
Once in Download mode, flash the bootloader with
heimdall flash --BOOT ./path/to/files/halium-boot.img -
The phone will reboot,
Unitywill appear, the screen goes back, the phone restarts thenUnityhangs. It is expected, then -
Enter
ip address showin a terminal, it should make display a new interface. Mine returns:
9: enp0s20u2: <BROADCAST,MULTICAST> mtu 1500 qdisc noop state DOWN group default qlen 1000
    link/ether 00:00:00:00:00:00 brd ff:ff:ff:ff:ff:ff
So the new interface name is enp0s20u2
-
Download helpers files from Github.
-
Run the script to setup the connection, send required files to the phone and connect to it:
bash helper-install-host.sh interface_name. Ex:bash helper-install-host.sh enp0s20u2 -
You should obtain a terminal on:
phablet@ubuntu-phablet:~$ -
Setup Wi-Fi thanks to:
- Enter
nmtui - Select
Activate a connection - Select your SSID
- Enter your Wi-Fi password
- Push
tabto select<Quit>thenenterto exit
- Enter
-
Start the configuration script thanks to
bash helper-install-phone.sh -
Answer
ywhen prompted (twice)
The phone should reboot, then you are in! :-)
Share this post
Twitter
Google+
Facebook
Reddit
LinkedIn
StumbleUpon
Pinterest
Email